Thursday, January 27, 2011

Who Lives In a Pineapple Under the Sea?

SPONGEBOB SQUAREPANTS!

So I was asked to make Spongebob cupcakes for a little girl's birthday party recently. I was really excited about this request because I had been wanting to do three things for a while: sculpt and make shapes out of fondant, use my new exacto knife, and use my new edible ink pens!


Now I couldn't for the life of me figure out how to make these photos sit horizontally, but I wanted to include them to show the process these cupcakes went through. As I cut out each step, I saw a little bit more of Spongebob and Patrick forming. This was one of the first projects I've done where I was able to plan and execute what I wanted to accomplish in a timely and organized manner. Woo hoo!

These are Spongebob's noses and mouths.

They both looked kind of creepy with just eyes!

Then all of a sudden... POOF!
They came together so quickly!

And just as quickly as I started, they were finished! Except for the black dots on Spongebob's eyes.

Sometimes Patrick looks cross-eyed, sometimes he looks angry, but he always has that goofy smile!

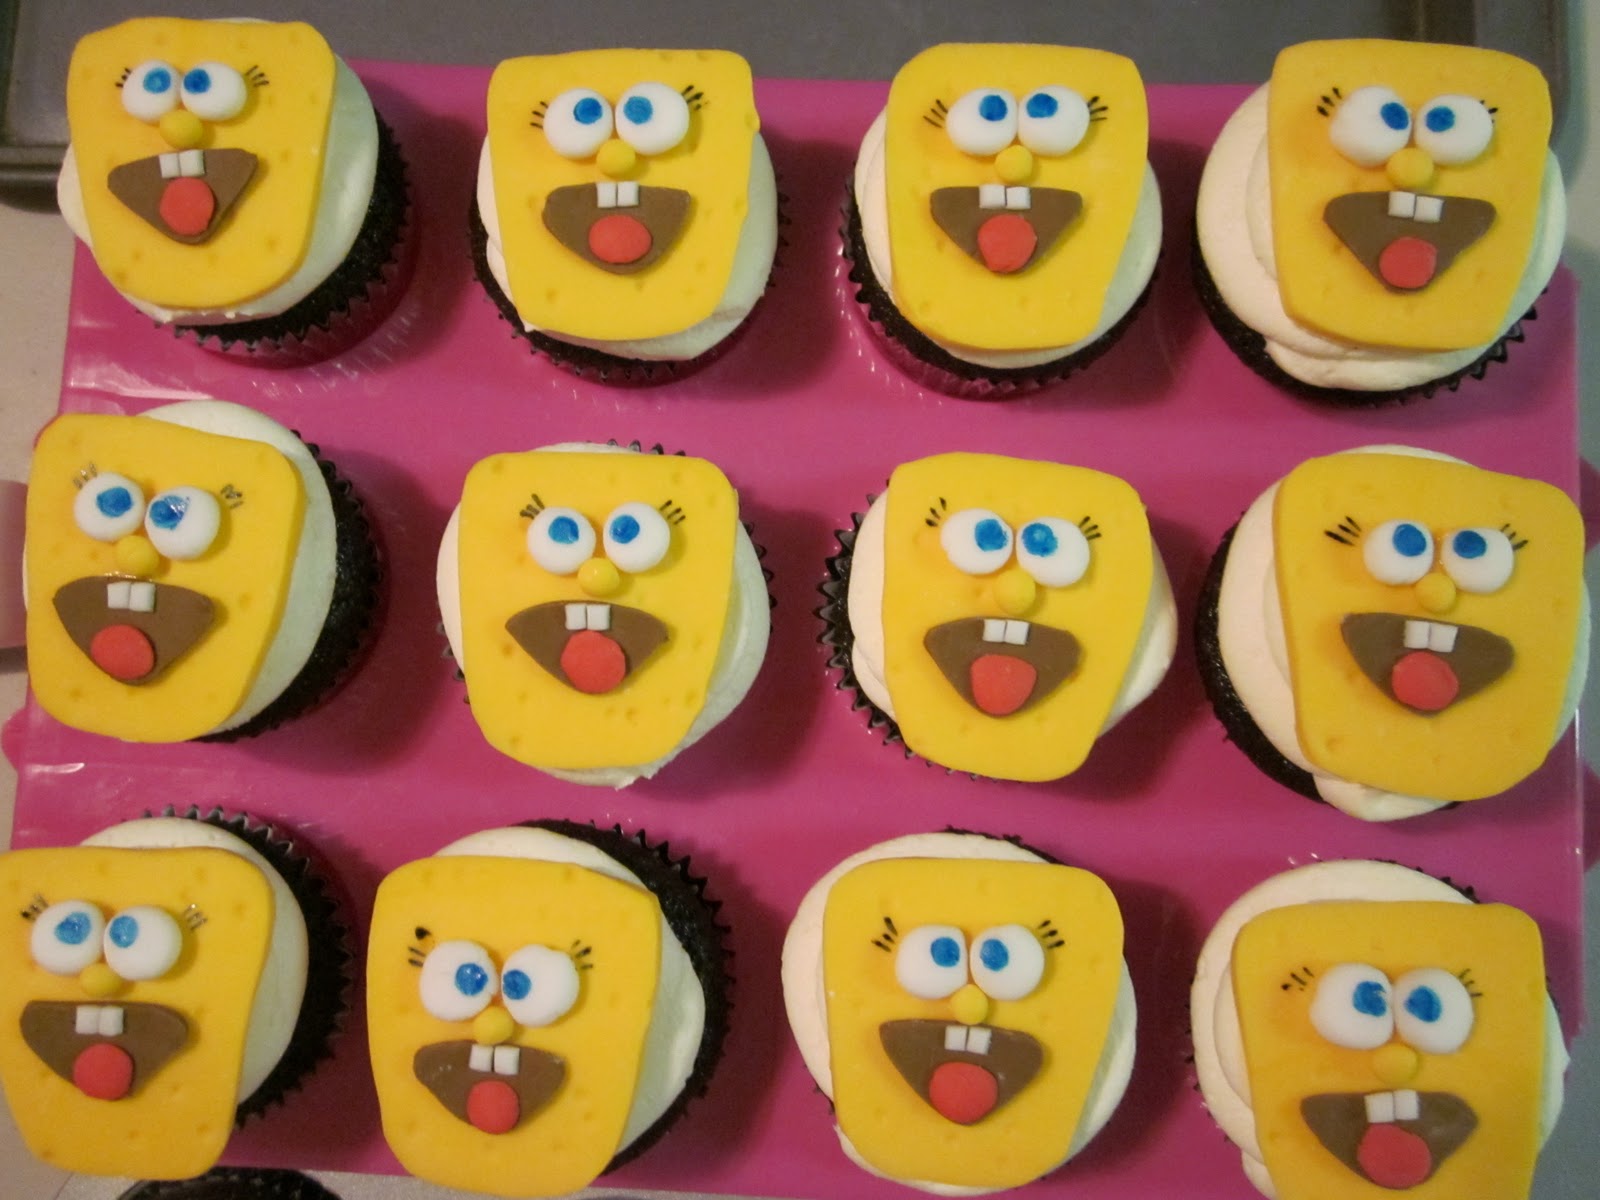
Spongebob pre-black dots.

Spongebob post-black dots.

I couldn't decide which one I liked more. But I obviously couldn't take it back once it was done.
I was very excited and very proud once these little cuties were finished.

These cupcakes were made for a party at Sketch and Sip. Patty Sisco, the owner is one of the most creative people I know and I am so glad I've been able to work with her on so many occasions. I could actually write a whole post on all the occasions we've worked together or worked on projects for each other. As a matter of fact, that's a wonderful idea! Mental Note. :)


Saturday, January 15, 2011

I know, I know!

I've been talking about starting this blog for about a year, I got a camera for Christmas, and I vowed that in the new year I will get this blog started and post almost everyday.

I've only posted once. 
I'm a bad blogger!
I'M SORRY!
I will be better.
Pinkie Swear!

Okay. So I just ordered these amazing cupcake pedestals. I've been ooh-ing and ahh-ing over them for months now. So I splurged. And now I'm so anxious to get them! Which also means I'll have to make cupcakes to take pictures, naturally.

Photo courtesy of Farmhouse Wares website, link below.

I saw them on a different website sold individually way back then, but alas when I went back to purchase them, they were gone. So I found them sold in a set of six here.

I also am absolutely obsessed with this cake stand & the cake is absolutely adorable too :)

Photo from The Good Apple blog, link posted below.

I first saw it on Melissa's blog, The Good Apple and immediately emailed her to ask her where she purchased it. Unfortunately for me it was from a small place in Queen Creek, AZ called Designer Blvd. The website didn't have a store for me to shop on and I don't have any trips to Arizona planned. So if anyone in AZ knows if they're still there and wants to ship one to me, I would love you forever. Seriously!


Sunday, January 2, 2011

Love This.


Nothing could make me happier right now than staring at my shiny brand new KitchenAid Stand Mixer. Nothing besides using it, that is. So what recipe should I make to christen my beautiful new kitchen accessory... "Xtra-Special" Celebration Cake from the Gold Medal Alpha-Bakery cookbook from James' Childhood.


James told me how he used to skip school and stay home and bake with his mom when he was younger. He made almost all the recipes from this book, but hasn't been able to find the book in years. The "Xtra-Special" Celebration Cake was one he would make for his sister's birthday. I knew this was a cookbook I wanted to have for my kids. So I went online and found one of the only 3 used copies up for sale. 

Step one: Mix dry ingredients in a bowl. (In this recipe, sugar counts as dry)


Step Two: Add wet ingredients to the bowl of your stand mixer.


Step Three: Slowly add dry ingredients and mix until well combined.


It should look something like this. Smooth with no lumps.


Step Four: Fill cupcakes about 2/3 full. Bake @ 350 for 18-22 minutes. (I wanted to make cupcakes, so I reduced the time and kept checking them to see if they were done.


When I brought them over to his house, his sister could tell just from the smell that it was the same recipe from that cookbook and their childhood. I was amazed. I would love to show the finished product, but they went so fast I couldn't even get a picture! The original recipe can be found here.